Ajvar Recipe – Balkan Roasted Pepper Spread
This ajvar recipe makes a thick Balkan roasted pepper spread with a sweet, savory flavor and a slightly textured finish. In this version, red peppers lead and roasted eggplant adds body. The vegetables are peeled, drained, and slowly cooked with sunflower oil, garlic, salt, and a little vinegar until the spread becomes glossy and concentrated.
The flavor comes from patient preparation rather than a long spice list. Roast the peppers until the skins blister and darken, remove those skins without washing away the juices, and keep some texture when grinding the flesh. Gradually working in the oil gives the finished ajvar a rich, spreadable consistency.
Set aside a substantial part of the day: the planning estimate is about eight hours when the vegetables need two roasting batches, including three hours of refrigerated draining. Some preparation can overlap, but the vegetables and pot determine the actual pace. This recipe is intended for the refrigerator or freezer and does not provide a shelf-stable canning method.
Ajvar
Ingredients
- 6 2/3 lb red sweet pointed peppers ripe and thick-fleshed; whole weight before trimming
- 2 1/4 lb eggplants whole weight before trimming
- 6 3/4 fl oz sunflower oil
- 5 tsp fine salt
- 4 cloves garlic large; peeled and finely grated
- 2 tbsp white wine vinegar 5% acidity; distilled white vinegar is an alternative
- 1 red hot pepper optional; adjust to taste
Equipment
- Heavy baking sheets Arrange the vegetables in a single layer; use additional roasting batches when needed.
- Heat-safe bowl and cover For steaming the roasted peppers.
- Knife and cutting board For peeling and trimming.
- Large sieve and clean cloth Set over a bowl and drain in the refrigerator.
- Grinder or food processor Use a medium plate or short pulses to retain texture.
- Wide heavy pot A broad surface helps evaporation; larger quantities may need more pots or batches.
- Sturdy spoon Sweep the entire pot bottom while stirring.
- Kitchen scale For the vegetable weights and seasoning.
- Shallow storage containers Heat-safe for cooling; use freezer-safe containers for frozen portions.
Method
- Prepare the vegetables. Wash and dry the peppers and eggplants. Preheat the oven to 450°F (230°C), conventional heat, or 410°F (210°C) with convection. Prick each eggplant several times with a fork.
- Roast in uncrowded batches. Arrange the whole vegetables in a single layer on heavy metal baking sheets. Roast each batch for about 40–55 minutes, turning the peppers once or twice, until the skins blister and darken and the flesh softens. Remove eggplants when completely soft; large ones may need longer. Roast any optional hot pepper alongside the sweet peppers.
- Steam and peel. Transfer each batch of hot peppers to a heat-safe bowl, cover, and steam for 20 minutes. Remove stems, seeds, pale membranes, and skins without rinsing the flesh. Scoop the eggplant flesh from its skin and discard burnt skin fragments.
- Drain under refrigeration. Place the peeled flesh in a clean cloth-lined sieve over a bowl. Refrigerate peeled portions promptly as you work, within 2 hours of roasting, or within 1 hour if the room is above 90°F (32°C). Cover loosely and drain in the refrigerator for 3 hours after adding the last batch. Discard the drained liquid.
- Grind with some texture. Pass the drained vegetables through a medium grinder plate, or pulse in small batches in a food processor. Aim for a fine, slightly fibrous texture rather than a smooth puree. Include the peeled optional hot pepper if using.
- Reduce the excess liquid. Put the ground vegetables into a wide, heavy-bottomed pot. Cook uncovered over medium heat for about 15 minutes, stirring across the bottom to evaporate excess moisture.
- Work in the oil gradually. Stir in about one quarter of the oil. Once incorporated, add the next portion, continuing until all the oil is worked in. Cook uncovered over low to medium-low heat for 60–90 minutes, stirring regularly and more often as the mixture thickens.
- Season near the end. About 15 minutes before the end of cooking, stir in the grated garlic, salt, and vinegar. Continue stirring and cooking until the spread is thick and glossy, clings to the spoon, and a trail drawn across the pot bottom stays briefly visible. Cool a spoonful on a clean plate before tasting the seasoning.
- Cool and refrigerate promptly. Divide the cooked ajvar into clean, small, shallow heat-safe containers. Refrigerate promptly rather than leaving a deep pot or full jars to cool on the counter. Refrigerate within 2 hours of cooking, or 1 hour above 90°F (32°C). Keep at 40°F (4°C) or colder and use within 3–4 days.
- Freeze surplus, do not pantry-store. For longer storage, chill promptly in the refrigerator, then pack in freezer-safe portions with expansion space and freeze at 0°F (−18°C). Best quality is about 3 months. Thaw in the refrigerator and use within 3–4 days. This recipe is not a validated canning process: hot filling, a sealed lid, vinegar, or an oil layer do not make it shelf-stable.
Nutrition
Notes
- Peppers: Thick-fleshed, fully red pointed peppers such as kapija are preferred. Ripe red bell peppers are a practical US alternative; yield and roasting time vary.
- Measurements: US quantities are rounded. Select Metric for the source weights. Vegetable weights are before roasting, peeling, and trimming.
- Texture: Peel without rinsing, drain in the refrigerator, and grind or pulse briefly. A wide pot and slow reduction produce a thick, slightly textured spread.
- Timing: The displayed time is a planning estimate for preparation, roasting in batches, steaming, refrigerated draining, and slow reduction. Some tasks overlap; extra batches or wetter vegetables take longer. Final chilling for storage is additional.
- Scaling: Increase roasting batches and cooking surface area. Ingredient multipliers do not make one overloaded pan cook at the same speed.
- Storage: Refrigerate promptly in small, shallow containers at 40°F (4°C) or colder and use within 3–4 days. Freeze chilled portions for about 3 months of best quality. Use clean utensils and discard questionable food without tasting.
- No pantry canning: The vinegar is for flavor. Hot filling, an oil layer, and a vacuum lid are not a validated preservation process. This recipe is for refrigeration or freezing only.
- Nutrition: Approximate per serving, calculated from the starting metric ingredient quantities; optional hot pepper is excluded. Peels, seeds, drained juice, and actual nutrient retention were not measured, so retained nutrients and portion weight vary.
What Makes Ajvar Different from a Pepper Sauce?
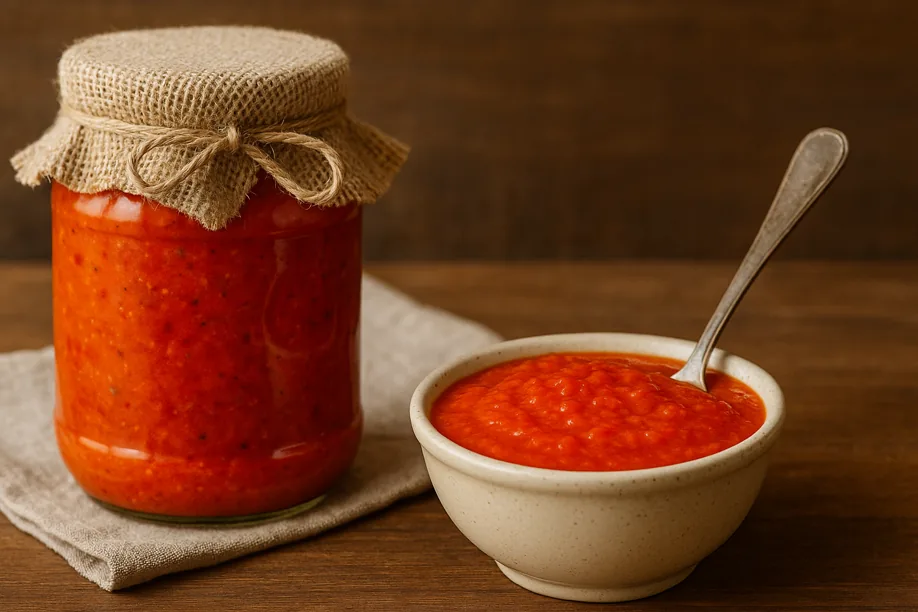
Ajvar is made by roasting, peeling, grinding, and reducing the peppers. That sequence concentrates their flavor and creates a spread that holds on a spoon. It should retain a little fine vegetable texture rather than become a thin, completely smooth sauce.
Regional and family versions differ. Some use peppers alone; others include roasted eggplant, garlic, or hot peppers. This recipe follows a pepper-forward version with eggplant. The eggplant supports the texture without replacing the red pepper as the main flavor.
Choose Thick-Fleshed Red Peppers
Fully ripe, meaty red pointed peppers such as Kurtovska Kapija (also called Kurtovka) are a good choice. Choose peppers that are red all over rather than partly green; ripe flesh gives the spread its sweetness and deep color. Look for firm fruit without mold, soft spots, or damaged flesh. Thin-walled peppers leave less flesh after roasting and peeling, so the same starting weight can give a smaller yield.
In the US, ripe red bell peppers are a practical alternative when thick-fleshed pointed peppers are unavailable. Their shape and water content differ, so follow the visual roasting cues and the final texture rather than expecting an identical yield.
Roast Until Blistered, Then Peel Without Rinsing
Dark skin, tender flesh
Give the whole peppers room on the baking sheets and turn them during roasting. The skins should blister and develop dark patches while the flesh softens. Eggplants are ready when fully soft; a large eggplant may need longer than the peppers. Dark patches on the pepper skin are useful, but the flesh underneath should remain soft and usable rather than burned dry. Peppers that are merely soft and still pale have less roasted flavor and can be harder to peel. Turn them so the blistering reaches around the sides, and remove individual vegetables as they become ready.
Steam briefly and peel carefully
A covered twenty-minute steam helps loosen the pepper skins. The goal is to release the skins, not to leave the vegetables cooling for hours in their pooled juices. Work batch by batch, removing stems, seeds, membranes, and skins. Lift out the eggplant flesh and discard burnt skin fragments. Avoid rinsing the peeled flesh, which adds water and carries away some of the flavorful juices. Remove stubborn seeds with your fingers or the dull side of a small knife. A stray seed is less of a problem than soaking the peeled flesh to remove every last one.
Drain Cold and Keep a Little Texture
Let excess water escape before grinding
Drain the peeled vegetables in a cloth-lined sieve in the refrigerator. Move peeled portions into the refrigerator as you work, rather than letting the first batch sit out while later batches roast. The three-hour drain begins after the last batch is added. Keep the sieve above the collected liquid so the vegetables do not sit in it, then discard the drainage. Skipping this stage transfers more water to the pot and can lengthen the reduction considerably. Draining and cooking work together; draining alone does not create the final spreadable texture.
Grind or pulse rather than puree
A grinder with a medium plate gives a fine, slightly fibrous texture. A food processor also works when used in small batches with short pulses. Stop before the vegetables become a uniform puree. Check between pulses and process small batches evenly. An immersion blender can turn the area around its blade smooth while leaving larger pieces elsewhere, making it harder to control this texture.
Use a Wide Pot and Add Oil Gradually
Reduce water before adding richness
First cook off some excess liquid without oil. Then stir the sunflower oil in a portion at a time, letting each addition combine with the vegetables. A broad, heavy-bottomed pot provides evaporation area and helps you control the reduction. Keep it uncovered so steam can escape. Wait until each portion of oil is worked into the vegetables before adding the next. Neutral sunflower oil keeps the pepper flavor prominent; a strongly flavored olive oil would change the result.
Stir over the entire bottom, especially near the end. Reduce the heat if the mixture starts catching. The ajvar is ready when it is thick and glossy and a spoon drawn across the bottom leaves a trail that remains briefly visible. Judge the seasoning on a cooled spoonful.
Use a cooled sample to judge the finish
Push a little ajvar into a mound with the spoon: it should hold its shape softly rather than immediately flow flat. Put a small spoonful on a cold plate and let it cool for a few minutes. A pronounced watery ring suggests that more gentle reduction is needed. The spread firms somewhat as it cools, so do not cook it into a dry paste while it is still hot.
Doubling the ingredients usually means extra roasting batches or additional cooking surface. It does not mean a deep, crowded pot will finish in the same time. The displayed time is a planning allowance, not a kitchen-tested guarantee for every oven and pan.
Troubleshooting Homemade Ajvar
Why does it taste bitter?
Burned pepper or eggplant skin left in the flesh can add bitterness, as can scorched spread scraped from the bottom of the pot. Peel carefully and remove blackened skin fragments before grinding. Roasted flavor should not require leaving burned skin in the finished spread. Once bitterness is mixed throughout, extra oil or vinegar is not a dependable way to remove it.
Why is oil separating on top?
Oil added faster than it can be worked in may remain visibly separate, particularly while the vegetables still contain excess water. Pause further additions and keep stirring over low heat as the mixture reduces. Continue gradually once the existing oil is distributed. A glossy surface is expected; a substantial floating pool is a reason to slow down, not add more oil.
Why is the mixture watery?
Insufficient draining, a narrow pot, or stopping the reduction too soon can all leave excess liquid. Continue cooking uncovered at a controlled heat, sweeping the bottom regularly, and repeat the cold-plate check. Raising the heat sharply can burn the bottom before enough water evaporates from the rest of the pot.
What if it starts catching or burning?
As ajvar thickens, stir more often and reach the corners and the entire base of the pot. Lower the heat at the first signs of sticking. If a scorched layer has formed, stop scraping it into the spread. Carefully transfer the unburned portion to a clean pot without disturbing the stuck layer; this may limit further damage, but it cannot guarantee removal of an already burned flavor.
Can I reverse overprocessing?
Once the vegetables have been blended completely smooth, cooking cannot restore the lost fibers and small pieces. The result can still be used as a smoother spread if otherwise properly prepared and stored, but it will not have the intended texture. For the next batch, use a medium grinder plate or short food-processor pulses and inspect between pulses.
Refrigerator, Freezer, and Pantry Storage
Refrigerate promptly and use within 3–4 days
Divide the finished ajvar into small, shallow, heat-safe containers and refrigerate promptly. Follow USDA leftover-handling guidance: refrigerate within two hours, or within one hour when the room is above 90°F (32°C), and keep the refrigerator at 40°F (4°C) or below. Use within 3–4 days.
Freeze in portions for longer storage
For longer storage, chill promptly and freeze in suitable portions with room for expansion. About three months is the suggested best-quality period. Thaw in the refrigerator, use clean utensils, and use the thawed portion within 3–4 days.
This is not a validated pantry-canning recipe
The small amount of vinegar seasons the spread. An oil layer, hot-filled jar, or lid that pulls down while cooling does not validate pantry storage. Use a separately tested preservation recipe and process if your goal is a shelf-stable product; do not improvise a canning time for this thick spread.
Serving Ajvar
Spread ajvar on warm somun or pogača, spoon it beside ćevapi or grilled vegetables, or serve it with potatoes and cheese. A spoonful also works alongside kljukuša, a Bosnian baked dish of grated potatoes. The optional hot pepper adds heat; the mild version gets its flavor from sweet roasted peppers and garlic. If you avoid wine-derived ingredients, choose distilled white vinegar labeled 5% acidity.
Frequently Asked Questions
Does ajvar have to contain eggplant?
No. Pepper-only versions also exist. This recipe includes roasted eggplant and keeps the peppers as the main ingredient.
Can I use a blender?
A food processor with short pulses gives more control. Long blending makes the texture smoother than intended.
Is a sealed jar safe in the pantry?
No. This recipe has no validated canning process. Keep it refrigerated or freeze it, even if the lid appears sealed.